
Simplifying M2M development
|


|
|
Simplifying M2M development
|
|
Connect PC to dev kit device:
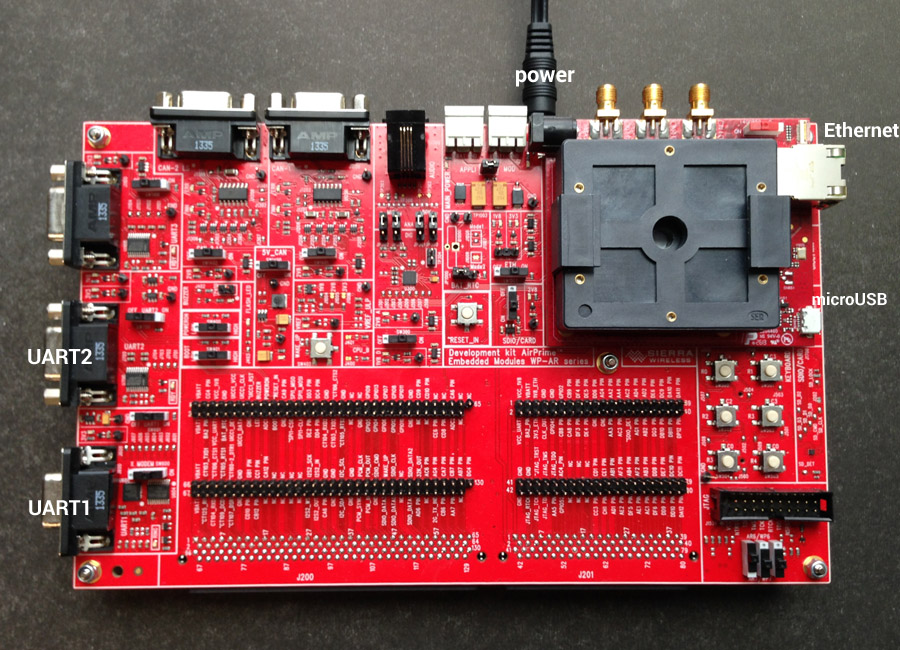
Photo of a Legato dev kit board:
Dev kit board required switch settings:
Cables used to connect the Legato development kit board:
UART2
Serial to USB cable to the dev host. Provides serial console to embedded Linux. Requires Minicom or similar tool to access device.
UART2 port settings:
If you’re running Minicom, set these config options through the CTRL+A O (configure) serial port setup.
Micro-USB
Micro-USB to USB cable to the dev host. Provides access to fastboot, CDC-ECM, CDC-ACM (AT commands), USB Audio, and Ethernet over USB (through an adapter). Requires ECM to be setup. Disabled by default.
Ethernet
Ethernet cable for direct network connection to obtain dynamic IP address for the device using DHCP.
Assemble Device Dev Kit
Bootable USB Stick
Install Packages
Copyright (C) Sierra Wireless, Inc. 2014. All rights reserved. Use of this work is subject to license.